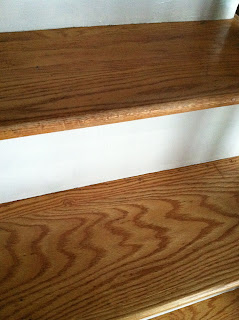
It began in the autumn of 2012. Mama and I couldn't live for one more minute with the green carpet on the stairs, so we tore it up. The house we live in has red oak hardwood everywhere except the bathrooms and kitchens. If you haven't done this before then a really good pair of pliers really helps with gripping the edge of the carpet and pulling up staples. Or whatever works. Really, it doesn't matter as long as you get the carpet up.
The wood wasn't in the best shape, but it wasn't in bad shape either. It was very rough though and the polyurethane very yellowed. We sanded down to the raw wood but not far enough to get many of the scratches out, because that would eat into the wood too much. They're really not that noticeable in person. We sand with an electric sander with 60 grit sandpaper until the raw wood is reached and then finish it with 160 or higher so the wood is smooth. Then, cleanup. That part is not fun. Then, polyurethane!! I apply satin oil-based polyurethane with a foam brush, making sure to apply it slowly (to reduce bubbles), thinly, and evenly. It usually takes around 5 thin coats.
Top: before, Bottom: after
The hardest parts are around the corners and the balusters I couldn't get out. Usually you can dislodge them but a few were seemingly glued and nailed in. That seems really unsafe to me, but it wasn't mine or my family's doing so what can I do.
The difference in finish is great. They're perfectly smooth on bare feet, whereas before they were rough and splintery. The satin finish looks very natural. I love the way the light reflects off of them. I do like when treads are stained darker, but I don't mind the natural color of the red oak either. It's Mama's preference, so whatever makes her happy makes me happy.
At the moment there are still 3 (out of 13) steps to go. Life always gets in the way but we usually get a stair done in a day when it's a good day to do it. It's a noisy, messy, stressful day though. All the necessary coats of polyurethane usually take a few days, with everyone skipping over the step until it's dry. After the stairs are done I'll be painting the risers a clean, glossy white. After that, maybe a banister project. We'll see...


